Test general
What is a test?
Tests are executed on clients to provide information about the network environment or the availability and performance of a cloud services from the client's perspective. A test can e.g. validate a network property, check the availability of a service or measure the latency to a specified target.
Generally, different tests use different methods and targets. They can also differ in the their execution schedule and the chosen status limits.
Which tests a client actually executes can be configured in the portal.
Configure the tests
The tests that a client executes can be defined in the configuration section of the portal.
In the Tests tab, tests can be created, edited, and removed. To execute a test, it must be assigned to a test set. These test sets are then assigned to locations or specific clients that execute the tests. A test should also get assigned to a service for its results to appear on the health pages.
Tests
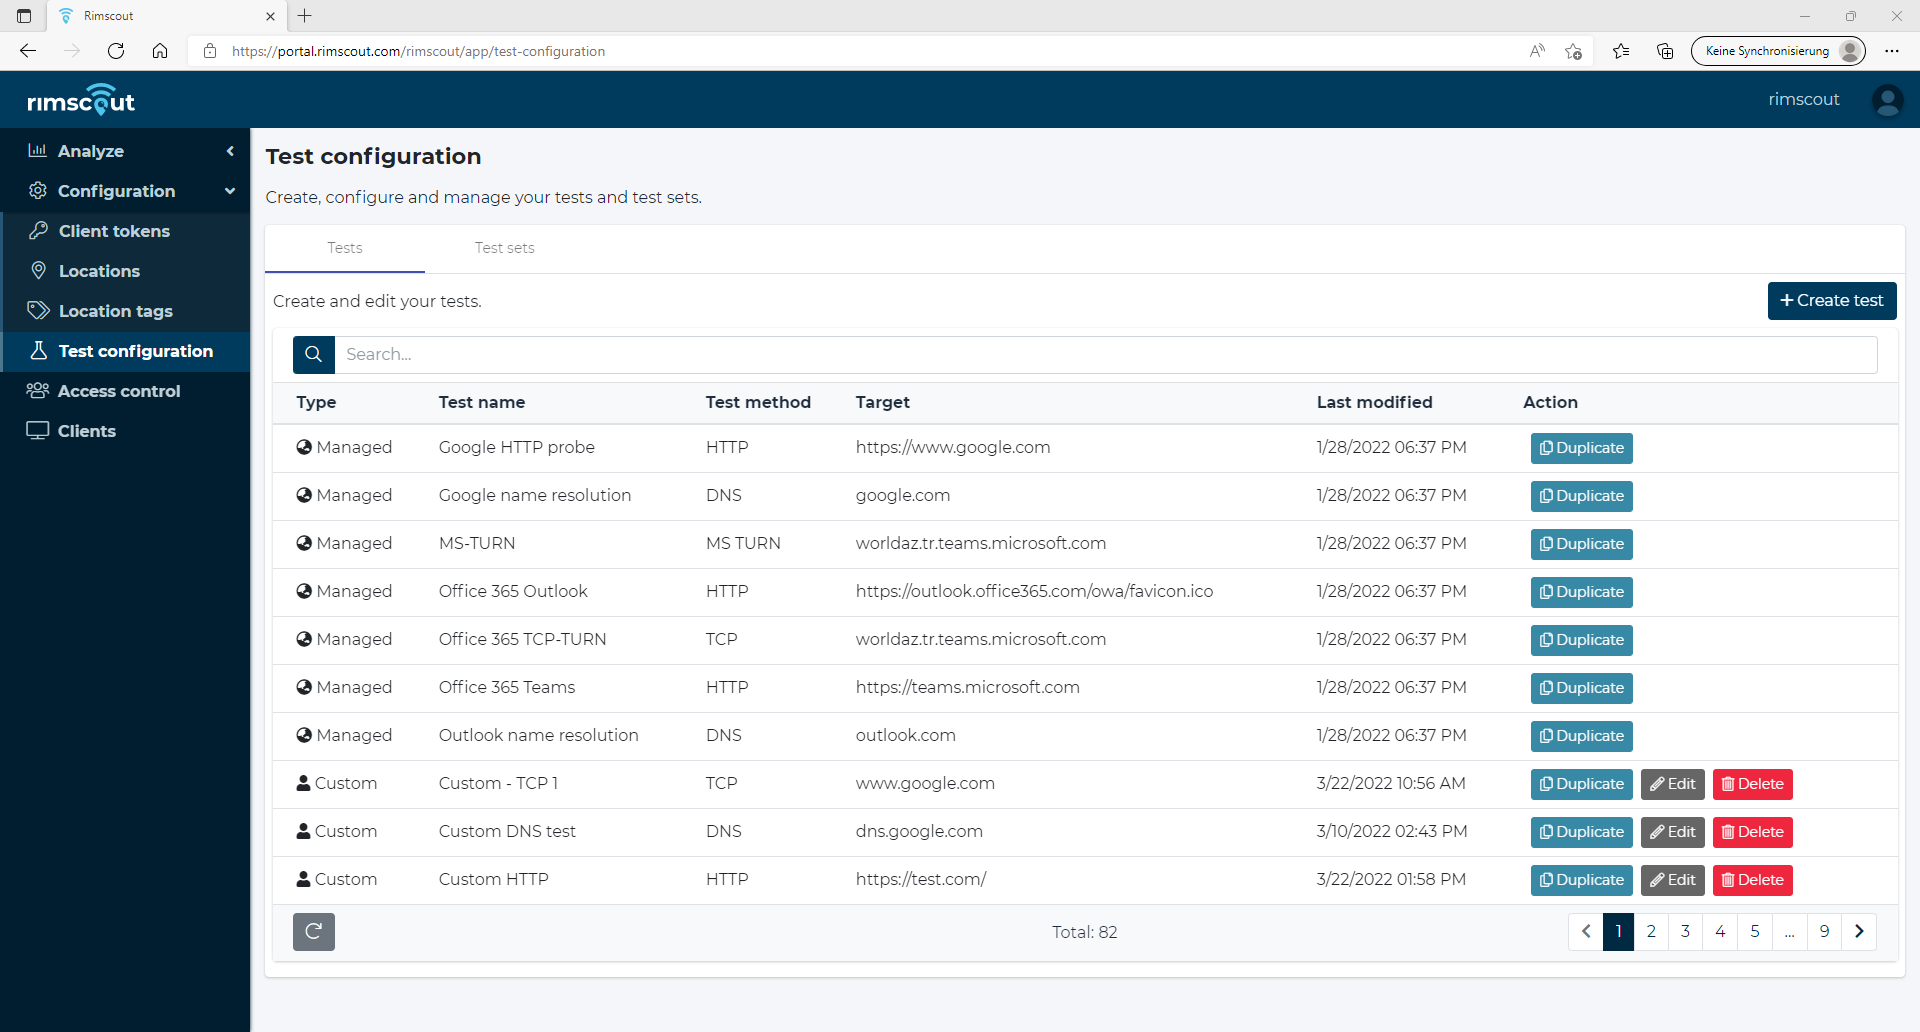
To see all configurable tests navigate to Configuration > Tests. The tests are listed in the Tests tab.
Test types
There are generally three type of tests: Built-in, Managed and Custom.
Built-in tests
Built-in tests are not shown in the list of tests as these tests are neither editable nor removable. The built-in tests are a set of predefined tests that are always executed on every client.
Info
The built-in and managed tests are listed in the documentation under Predefined tests.
Managed tests
Managed tests are shown in the Tests table, but they are also neither editable nor removable.
These tests are preconfigured by the Rimscout team to provider tests for different analysis or as examples.
Unlike the built-in tests these tests are not executed on every client by default.
To execute a managed test on a client, the test has to be contained in a test set that used by that client.
Custom tests
Custom tests are tests created by a user. These tests are editable and removable and can be contained in any test set and assigned to any client or location.
Create a test
- Click on the Create test button on the
Teststab. - Enter a unique test name, choose a method and click on Next.
- According to the chosen method, provide the method specific parameters and click on Next.
- Specify the number of measurements per minute and click on Next.
- Specify the measurement thresholds and percentage and click on Next. Learn more
- Optionally, assign the test to test sets and click on Next.
- Optionally, assign the test to services and click on Finish.
Info
The test parameters section provides more detailed information about the different test methods and parameters.
Duplicate a test
A new test can also be created by duplicating an already existing test.
Therefore click on the Duplicate button next to a test in the tests list.
The creation dialog will open with the prefilled values of the duplicated test.
Info
The test method is fixed when duplicating a test.
Edit a test
- Click on the Edit button next to the test.
- In the edit dialog click on the tab where you want to make changes.
- Click on Save to save any changes or on Cancel to discard the changes.
Remove a test
- Click on the Remove button of the test.
- The confirmation dialog will inform you if the test is used in any test set. Click Remove to confirm the deletion.
Info
A removed test will be removed from all test sets that containted the test.
Test sets
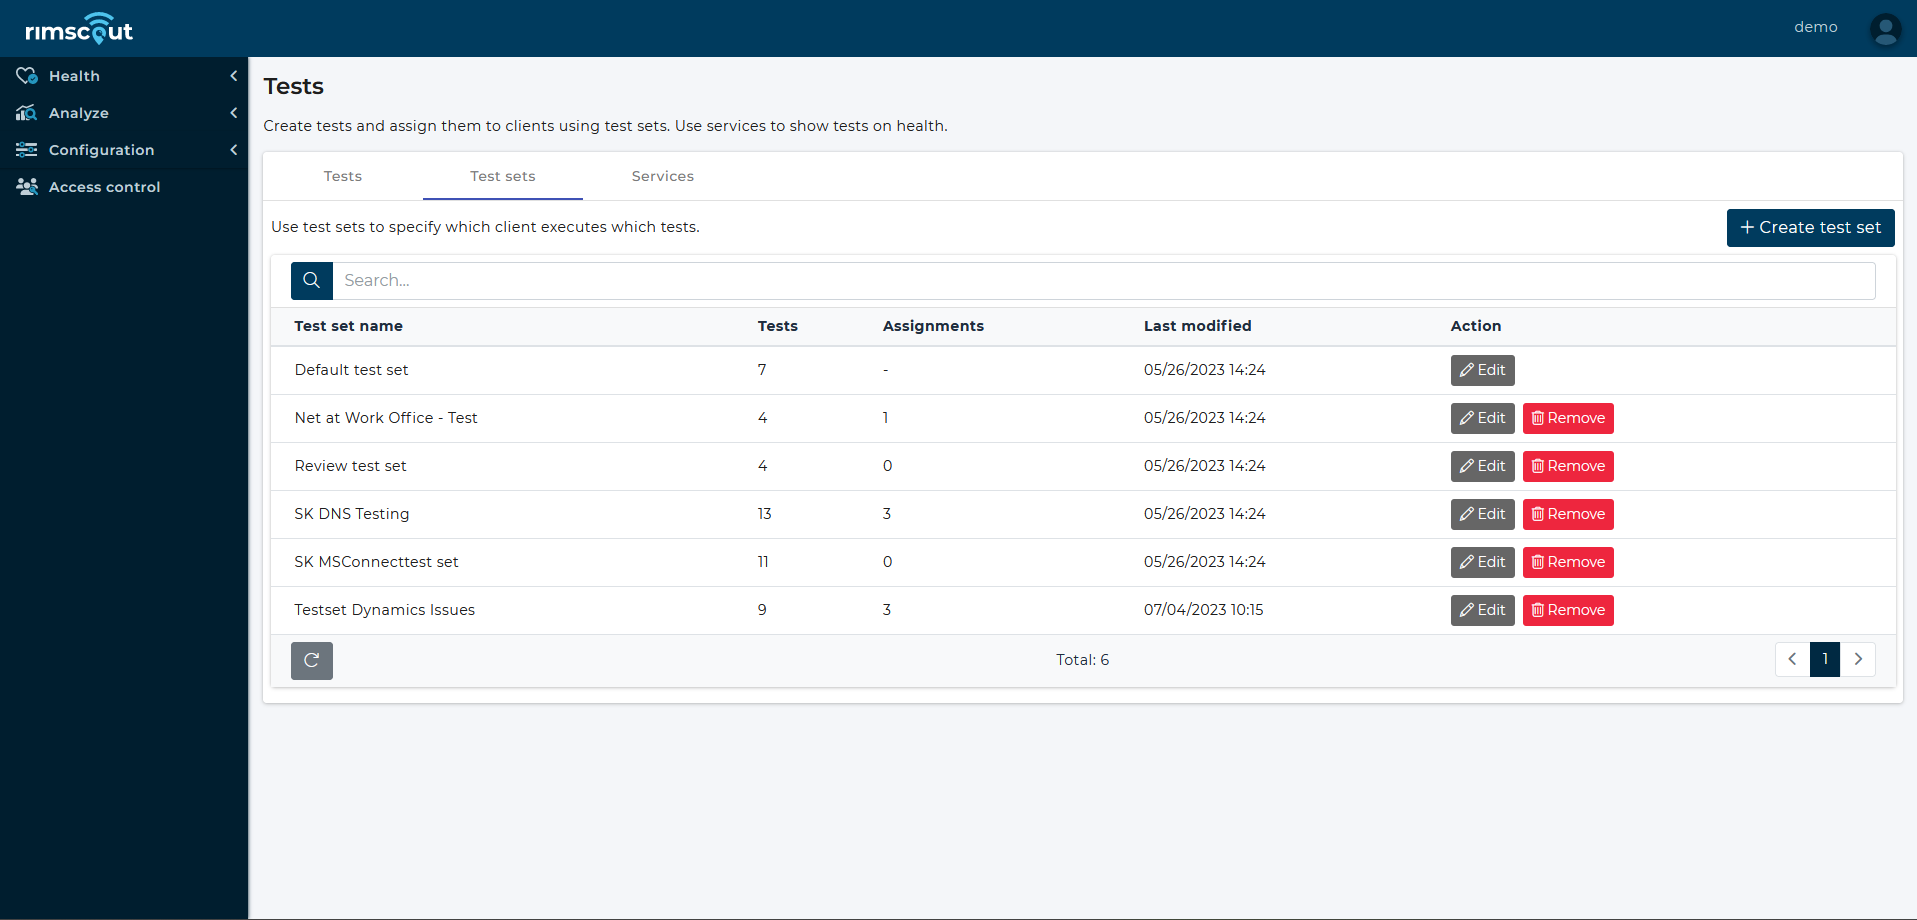
Test sets define which tests each client executes.
Default test set
The default test set is the first one in the list of test sets in the Test sets tab.
It cannot be removed, but the tests it contains can be changed.
If a client has no specific test set assigned, it will execute the tests contained in the Default test set.
Create and assign a test set
- Click on the Create test set button.
- Enter a unique test set name and select the tests that should be contained in this set. Click on Next.
- Select clients or locations to assign the test set to them and click on Next.
- If a popup informs you that some clients or locations are currently using a different test set, click on Reassign confirm that you want to change the assignment or on Cancel to review the assignments.
If a test set is assigned to a location, all clients in that location will execute the tests contained in the test set. Only clients that have a specific test set assigned to them will execute the tests of their assigned test set, despite the location they are in.
Info
Each test execution on a client consumes some CPU time and possibly some network bandwidth. Although each test on its own only needs very few resources, a lot of tests on a client may have a noticeable impact on the client's performance.
Edit a test set
- Click on the Edit button of the test set.
- Click on the tab where you want to edit something.
- Click on
Saveto save any changes or onCancelto discard the changes.
Remove a test set
- Click on the Remove button of the test set.
- The confirmation dialog will inform you if the test set is assigned to any client or location. Click on Remove to confirm that you want to remove the test set.
Info
Clients will switch to their location's test set (if available) or the default test set after the removal of their previous test set.
Export a test set
A test set can be exported as xml file to import it in another tenant.
- Click on the Export button of the test set.
- Wait for your browser to complete the export.
Import a test set
- Click on the Import test set button on the test sets tab.
- Select the your test set file in the file browser.
- If your test set name already exists choose to either replace the existing set or to create a new test set with prefix Import of.
Important notes
- An imported test set has no assignments to locations or clients and is therefore not executed unless it replaces the default test set.
- If a test in the test set already exists with the same name and parameters, it is assigned to the test set. If the parameters do not match, then a new test with prefix Import of is created.
- If a service does not exist, it is created on import.
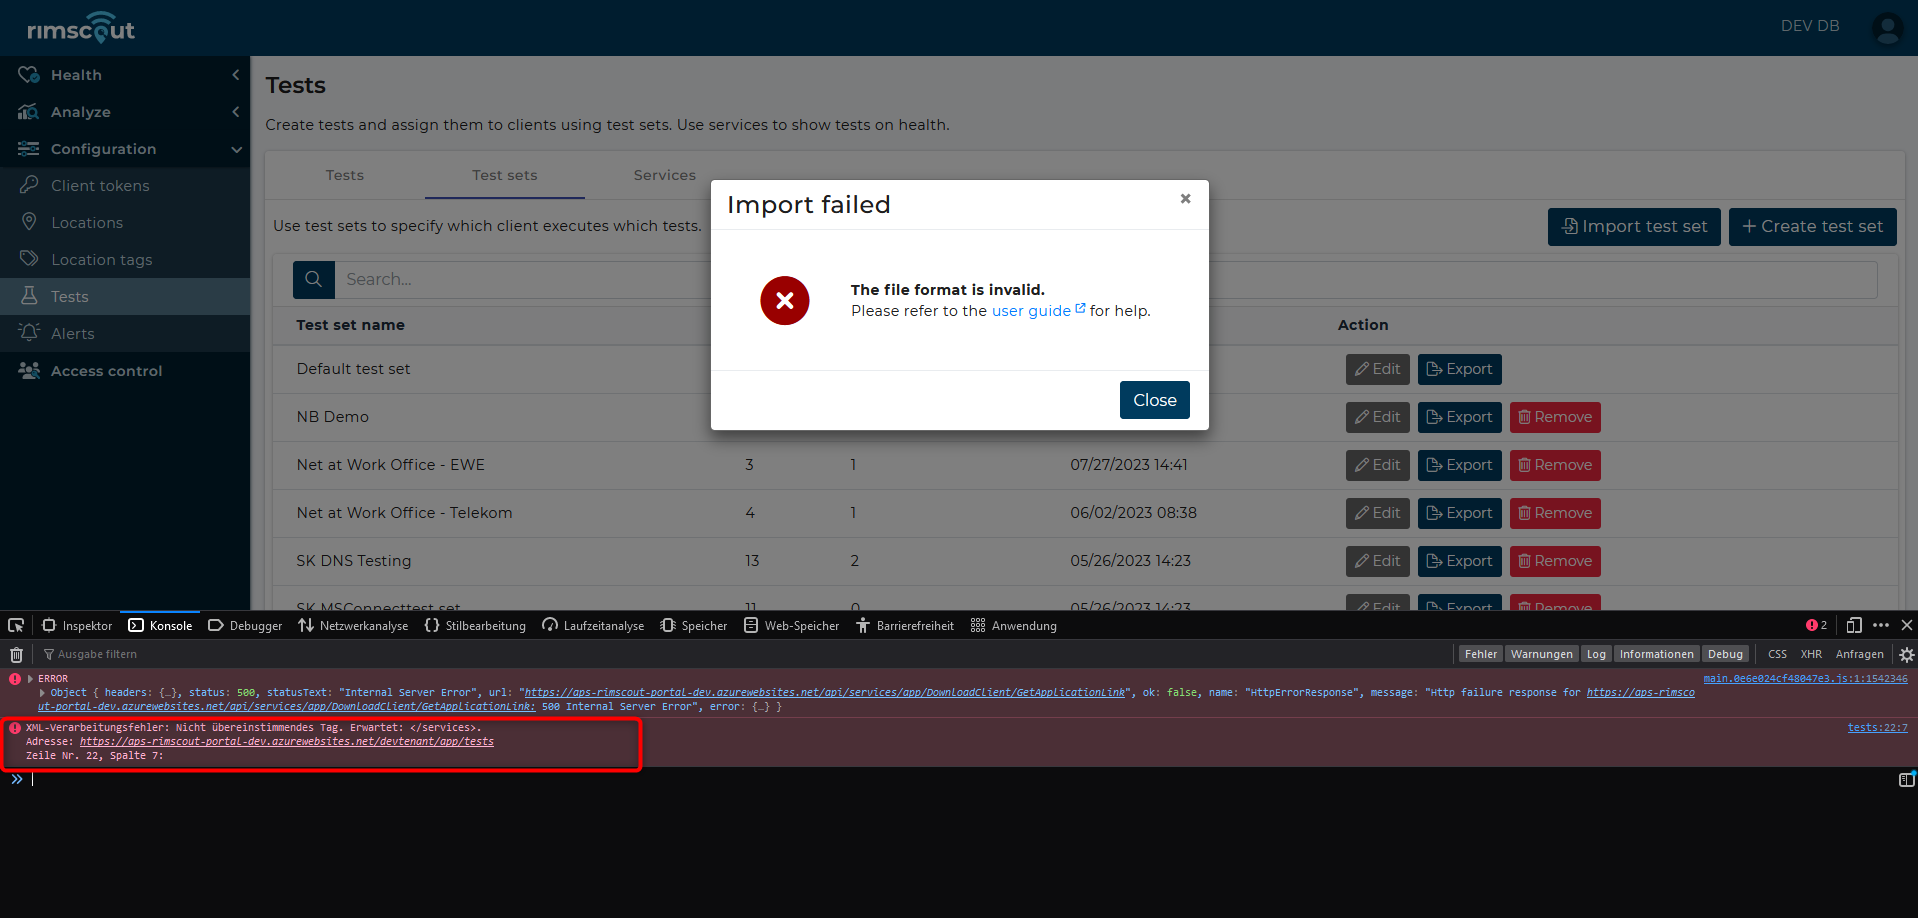
Troubleshoot invalid file format
In case you get a failure message that your file format is invalid:
- Open your browser devtools (press the F12 key).
- Open the console and search for the last errors.
- One error starting with something like XML processing error contains more error details.
- See the xml example below on how the correct format looks like.
<?xml version="1.0" encoding="utf-8"?>
<testSet xmlns:xsi="http://www.w3.org/2001/XMLSchema-instance" xmlns:xsd="http://www.w3.org/2001/XMLSchema">
  <name>Default test set</name> <!--Name of the test set.-->
  <tests> <!-- List of all tests of the test set -->
    <test xsi:type="https"> <!-- This element defines a single test.
    The attribute xsi:type denotes the test method.
    Depending on the method different child parameters are exspected.
    The attribute can have the values "http, upd, tcp, icmp, dns"-->
      <name>Outlook Client</name>
      <method>https</method>
      <parameters> <!-- The parameter elements are mostly common to all tests.-->
        <target>https://outlook.office365.com/owa/favicon.ico</target>
        <!-- <port>443</port> This parameter is only present for tcp tests-->
        <warningThreshold>500</warningThreshold>
        <criticalThreshold>1000</criticalThreshold>
        <percentage>10</percentage>
        <measurementNumber>58</measurementNumber><!--
          This element is not present for the udp method. -->
      </parameters>
      <httpParameters> <!-- Specific parameters for the http method.
      For methods udp and tcp see examples below. -->
        <httpMethod>HEAD</httpMethod>
        <acceptedStatuses>200-299</acceptedStatuses>
      </httpParameters>
      <services> <!-- List of services that the test is assigned to -->
        <service>
          <name>Outlook</name> <!--The name defines a service -->
        </service>
      </services>
    </test>
    <test xsi:type="udp">
      ...
      <udpParameters>
        <executionSchedule>monitoring</executionSchedule> <!--
        This defines the execution schedule for a udp test.
        Values "monitoring" for 1 packet per second and "assessment"
        for 50 packets per second are allowed as input.-->
      </udpParameters>
      ...
    </test>
    <test xsi:type="tcp">
      ...
      <tcpParameters>
        <checkTls>true</checkTls>
      </tcpParameters>
      ...
    </test>
  </tests>
</testSet>
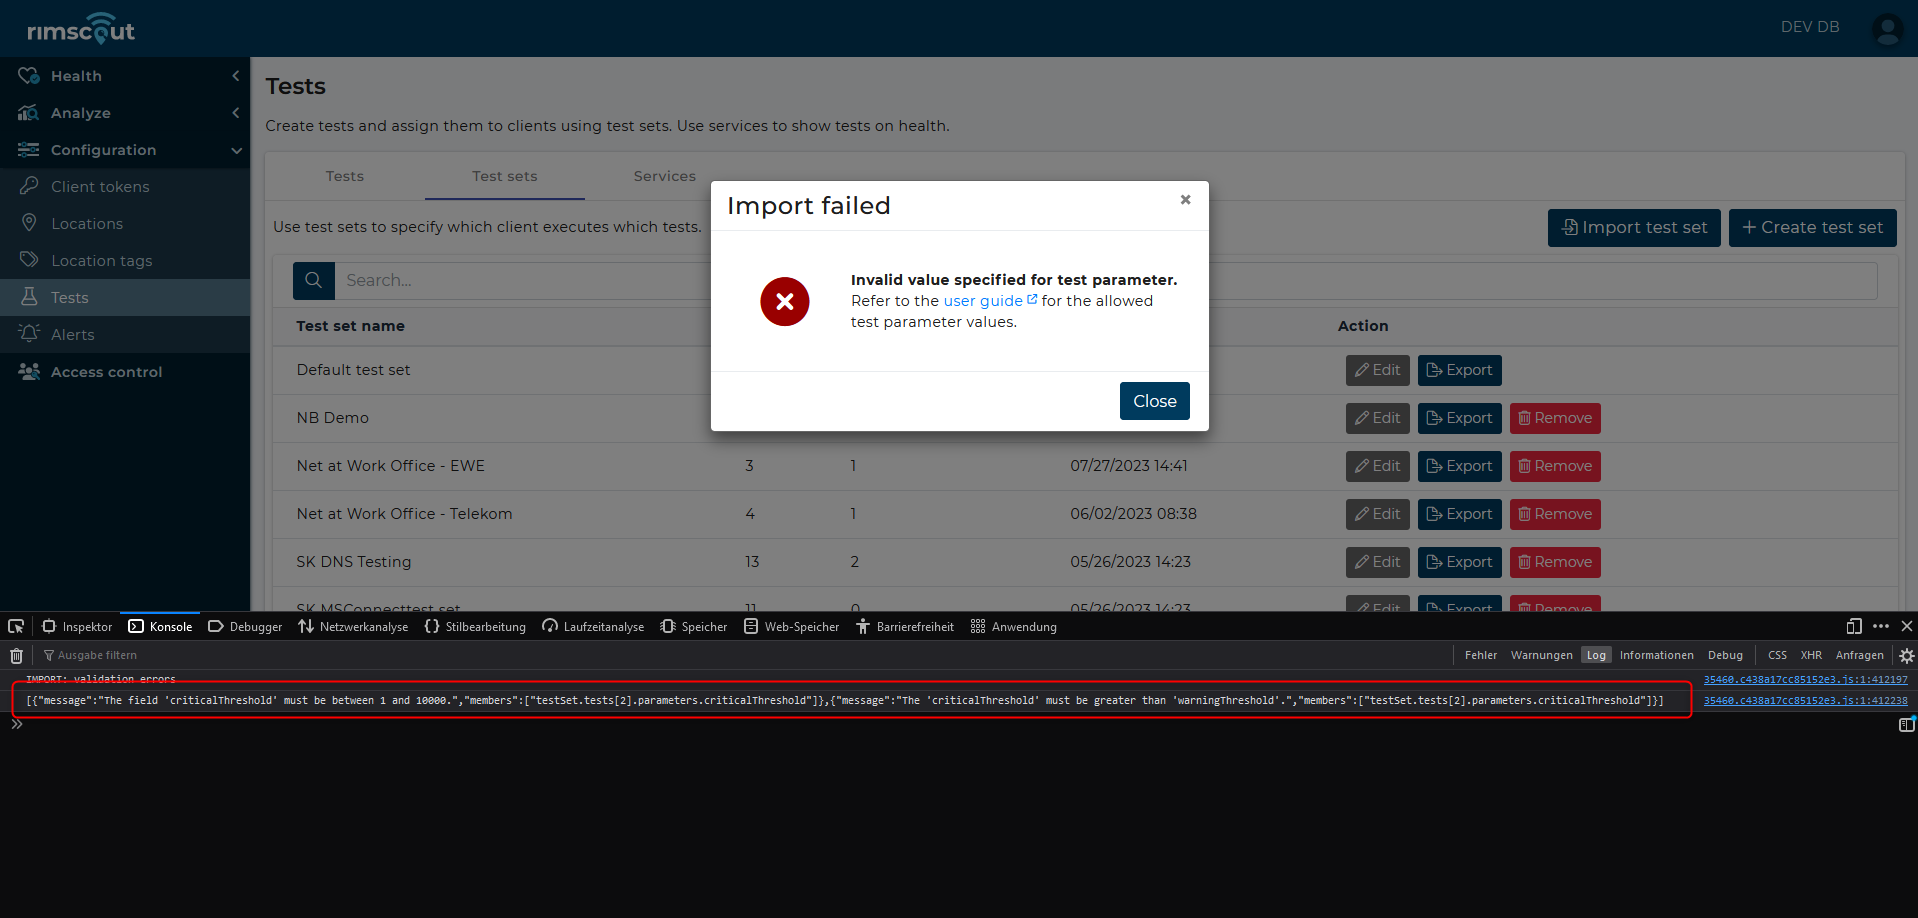
Troubleshoot invalid parameter values
If you get the failure message that your parameter values are invalid:
- Open your browser devtools (press the F12 key).
- Open the console and search for the last logs.
- One log starting with [{"message": contains more validation details.
- Navigate to Configuration > Tests in the Rimscout portal and open the test creation dialog. There you can find all allowed inputs.
Services
The health of a test is only shown on the health pages if it is assigned to at least one service.
To create, edit, and remove services, navigate to the Service tab within the Configuration > Tests section.
Info
Even if a test is not assigned to a service, its results can still be selected and displayed on the test result chart.
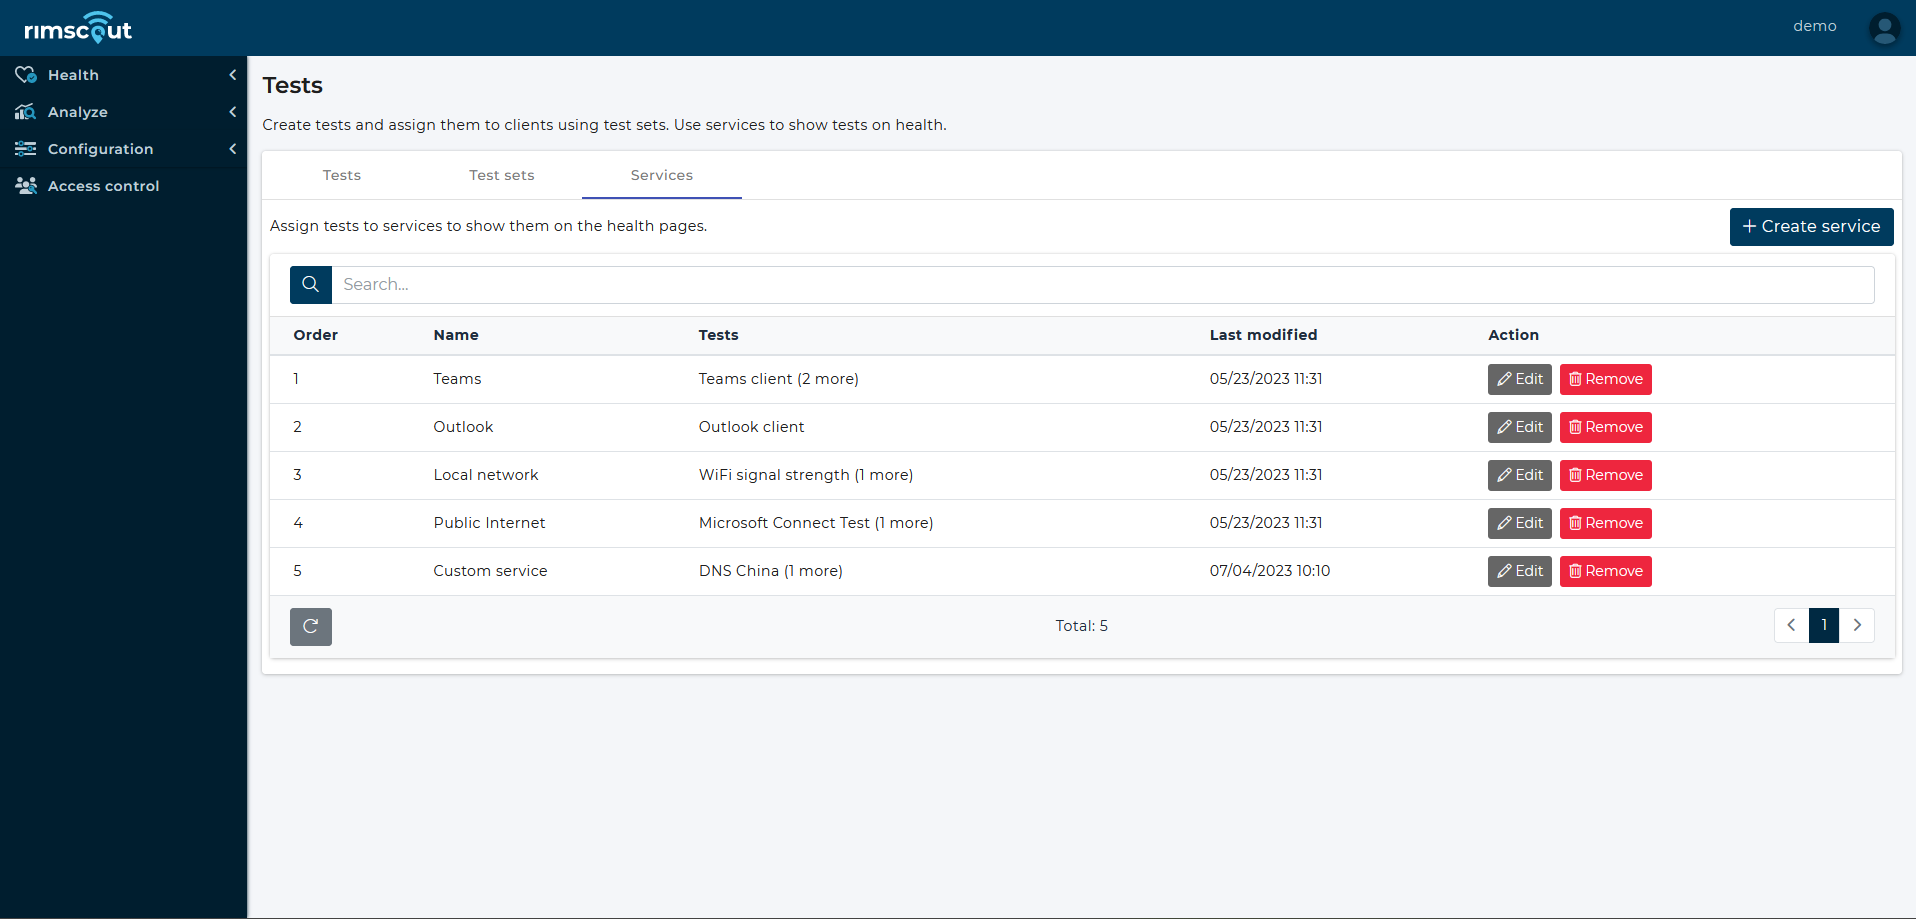
Create a service
- click Create service
- Enter a unique service name.
- Define the service order and click Next. The order of services in the list determines their display order on health pages.
- Select the tests that should be displayed within this service.
Edit a service
To edit a service, simply click on the associated Edit button.
Remove a service
To remove a serivce, click on the Remove button and confirm the deletion in dialog that appears. 2. The confirmation dialog will inform if the test is used in any test set. Click Remove to confirm the deletion.
Pre-configured services
A tenant's base configuration comes with pre-configured services that have managed tests assigned. For more information about these services, please refer to [here].
Next steps
Now that you have learned all main aspects of tests and how to configure them, you might want to learn about following aspects of Rimscout.
Learn where to access test results and health information:
Explore the details of pre-configured managed tests and services: